What products to take with you on the road?
If you have to spend quite a lot of time on the train (a day or more), relying only on the dining car in our country is hardly wise. Despite the fact that on the menu you will find a more or less decent set of fairly simple, but quite edible dishes, in practice everything is different. What can they offer you? Meat (pork) at a price of 300 rubles per 100 grams, meat solyanka at a price of 220-250 rubles per serving, and cucumber salad with bell peppers due to the fact that the tomatoes have run out. The conclusion suggests itself. You will definitely have to take some food with you on the road so as not to remain hungry for the entire period of the journey in the carriage. It is better to pack food not in bags, but in containers with tight lids.
Food for the trip on the bus
Considering the desire to chew something on the road, you should not deny yourself this for fear that the food will spoil. All you have to do is choose the right food.
Rules that are not recommended to be violated:
- Grocery purchases should only take place in places where this is accepted.
- It is necessary to carefully study the label of the selected product, it indicates storage conditions. When traveling, it is better to purchase products that can be stored at room temperature.
- Vegetables and fruits must be washed and dried at home. Then pack carefully. You should not do this on the train, since it is impossible to provide normal conditions for this there.
- It is better to eat perishable foods first.
Interesting Facts
Interesting facts about ice cream are associated primarily with the various cooling methods that people used when there were no freezing plants yet.
How was ice cream stored when there were no refrigerators?
The history of ice cream begins in the 3rd millennium BC. e. in Ancient China. Even then, noble houses loved to enjoy desserts made from frozen juices and fruits. To prepare ice cream, they used natural sources of cold (ice and snow), which were mined in the mountains.
Where was ice cream stored in the 15th-19th centuries?
Over time, people noticed that some salts (for example, saltpeter) when mixed with water react with the absorption of heat. If you mix saltpeter with ice, you can achieve a significant decrease in temperature (by 10-15 ° C). This cooling method was used until the invention of the freezing machine in the mid-19th century.
What is the name of the refrigerator in which ice cream was previously stored?
The ancient Persians invented their own “refrigerators,” which they called yakhchals and made it possible to produce and store ice for various purposes even in the summer heat. Yakhchal was a deep cellar, the walls of which were treated with a special heat-insulating solution, and a cone-shaped dome was erected above it. The ice in yakhchals was formed from water that came from underground sources to the lower part of the cellar and froze during cold nights.
How was ice cream stored in ancient times?
In ancient times, only natural sources of cold were available to people. Mining ice and snow from the mountains, and then delivering it before it completely melted, was a difficult task. Therefore, only very noble people could enjoy the frozen dessert. This went on for many centuries in a row.
Read also Minecraft: how to cross plants
The history of ice cream goes back thousands of years. People liked and will continue to like this delicious “summer” dessert. But unlike ancient people, we have every opportunity to store ice cream correctly and eat only high-quality products.
The favorite cooling treat of all children and adults melts very quickly, especially on a hot summer day. If you decide to have a picnic, then storing ice cream in a thermos is an excellent solution. All guests will be extremely surprised when, after a 3-hour trip in the summer heat, you treat them to a whole, unmelted frozen juice or creamy popsicle. This is quite feasible, you just need to know the elementary laws of physics.
Ice cream, oddly enough, is not a find of Europeans or Americans. The French are convinced that it was their “popsicle” that became the progenitor of all modern varieties of ice cream, but this is not at all the case. For the first time, an exotic dessert at that time appeared in China. Only very wealthy people could treat themselves to a new cold dish. The cooking technology was kept secret. In fact, the juice of fruits and berries was mixed with ice, resulting in fruit ice.

Making ice cream at home - main types
Ice cream has a variety of types, so everyone will find a suitable option. Moreover, you can enjoy the taste of dessert even on a diet, if you know the right recipe.
No cream
Ice cream without cream is the best option for those who are on a diet, but are not ready to completely give up sweets.
- Bring 450 ml to a boil. milk.
- Cool the milk.
- In a separate container, mix 4 yolks with ½ cup sugar.
- While whisking, slowly pour the warm milk into the yolks.
- Place on the fire and cook until thickened. Stir constantly!
- Cool to room temperature.
- Place in the freezer for 2-4 hours.
From milk
Ice cream made from milk has a pleasant creamy taste, which is why everyone likes it so much.
- Pour 1 liter into a saucepan. fat milk and put 100 g of butter.
- Bring to a boil and remove from heat.
- Separate 5 yolks from the whites.
- Mix the yolks with 2 cups of sugar and add 1 tsp. starch.
- Place a saucepan with milk on the fire.
- Gradually add the mixture with the yolks. Stir constantly!
- Boil.
- Remove from heat and cool in cold water.
- Place the ice cream in the refrigerator.
- Deliver every 3 hours and stir to prevent ice from forming. Repeat 2-3 times.
Sugarless
Another option for a light dessert is sugar-free ice cream. This option is suitable for people with diabetes.
To the surprise of many, the delicacy is almost no different in taste from the classic ice cream.
- Take 4 egg yolks.
- Add 1 g of vanillin to taste.
- Beat the yolks until foam forms.
- Pour in 200 ml. 10% cream and continue beating.
- Place the pan over low heat and cook the mixture until it thickens. Do not bring to a boil!
- Remove from heat and cool to room temperature.
- Pass the mixture through a sieve.
- Place in the freezer to chill for 40-60 minutes.
- Pour 500 ml into a separate container. 33% cream.
- Beat until thick foam.
- Remove mixture from freezer and add to whipped cream.
- Beat until smooth.
- Place in the freezer for 30 minutes, remove, beat and put back.
- Beat again and place in the freezer for 60 minutes.
- Take out the ice cream, stir with a fork or spoon and refrigerate for 2-3 hours.
Cream
Ice cream is a frozen dessert made from milk and cream. This type of ice cream has the highest fat content (12-20%), excellent taste and natural composition. Ice cream made in accordance with GOST does not contain artificial preservatives. It should be stored at a temperature no higher than -18°C, and the shelf life depends on the presence of fillers and packaging.
Read also: How to determine the groundwater level yourself
Pressed with and without filler
Pressed ice cream without additives at a temperature of -18°C can be stored for 3.5 months, and if additives are present, then 2.5 months.
Packaged with or without filler
Ice cream packaged for individual consumption can be stored at a temperature not exceeding -18°C for 4 months if it does not contain filler, and 3 months if there is filler.
Food for the road recipes, 10 simple recipes
- Classics of the genre: hard-boiled eggs and baked meat. It is better to wrap boiled eggs in paper. But for meat, it is better to give preference to chicken. It must be cooked until fully cooked, and when cooled, wrap it in foil.
- Frittata can become a favorite travel dish for the whole family, but it is not recommended to store it for more than a day. To prepare 8 pieces, you need to beat 6 eggs and 100 ml of sour cream in a large bowl until smooth. Then, add any filling to taste (spinach, tomato, raw smoked sausage, cheese, herbs). Knead the resulting mixture, pour it into a frying pan, or put the dough into muffin tins. Place in the oven, preheated at 180 degrees for 20 minutes.
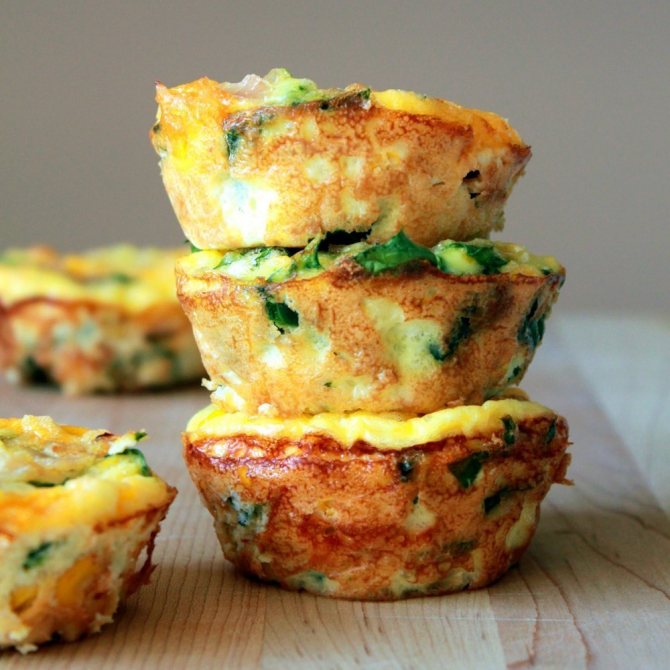
Frittata with chicken fillet and vegetables. 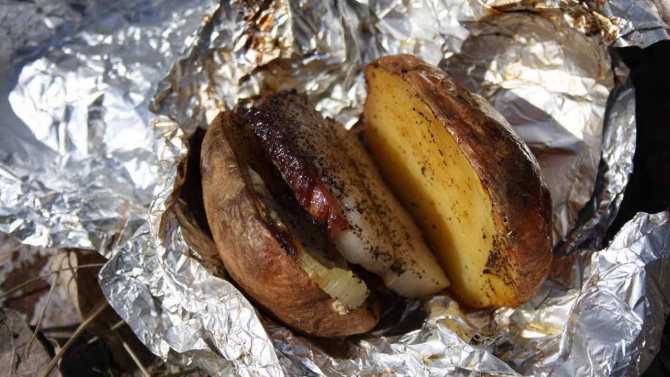
Cut the washed potatoes in half. Salt and pepper. Cut the lard into medium thickness. Season with salt and pepper and place in the middle of each potato. Wrap the vegetable in foil and place in a preheated oven. Bake until done.- Oat cookies:
- Sandwiches, sandwiches and pita breads. Their preparation can be completely different.

Cut the baguette in half, brush with sauce, put ham, meat, cheese, any vegetables, lettuce, and herbs inside. For every taste. Then cover with the remaining half. The main thing to remember is which products are not recommended for consumption on the road.It is better to wrap the finished rolls and sandwiches in parchment and then in a special bag.
- If you have somewhere to cook on the road, you can use the following idea for hot lavash sandwiches: . But if this is not possible, the idea can be used as an example. After all, eating rolled pita bread as shawarma is not as convenient as an envelope.
- Pastila is an alternative to sweets for travel. It's not difficult to prepare:
- More information about meat snacks:
- DIY vegetable chips. Thinly slice the vegetables and place on parchment. Place in the oven for 7-8 minutes. Sprinkle with your favorite seasonings. Remove from the pan only after the chips have cooled.
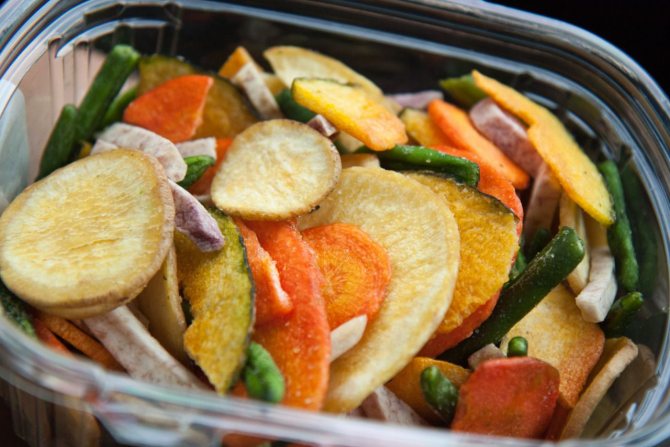
Homemade eco-chips are an excellent alternative to unhealthy store-bought chips. - Puff pastries, buns with fillings allowed on the road. To prepare, you will need to knead the dough, lay out the filling, give it the desired shape and bake until done.