Useful properties and contraindications of dried apples
The product contains potassium, iron, magnesium, phosphorus, selenium, and a number of other chemical elements. Dried apples contain vitamins A, C, E, K, group B. All these substances have a positive effect on the body, participate in internal processes, and help maintain immunity.
Beneficial properties of dried apples:
- cleanse the intestines and stimulate digestion. The merit of plant fiber;
- increase hemoglobin levels due to high concentrations of iron;
- strengthens gums and teeth; dentists recommend consuming it at least three times a week;
- reduce the manifestations of toxicosis, relieve morning sickness. It is advisable to chew a slice immediately after waking up, without getting out of bed;
- strengthen blood vessels, increase elasticity;
- reduce the level of bad cholesterol;
- remove toxins from the body, pectin helps a lot with this;
- improve brain function;
- have a positive effect on the functioning of the nervous system;
- maintain hormonal balance.
Do you prepare dried apples?
Not really
The product will cause harm only if you are individually intolerant. An allergic reaction is caused only by fruits with red or yellow skin. Contraindications for use are gastrointestinal diseases in the acute stage. But dried fruit compote is not prohibited. Use with caution if you have diabetes. We recommend harvesting sour green varieties.
Apples can be dried in air, in an electric dryer, microwave, or oven. The product is useful for children and adults, contains vitamins and minerals. Dried apples can be stored for up to two years. Regular checking is required.
Drying methods
Air drying
Drying apples in the sun is the most ancient, but no longer the most convenient way to prepare dried fruits. It is suitable for hot regions with a lot of sunny days. In the fall, it is unlikely that you will be able to dry apples in the open air; the air must be hot so that the apples do not rot, but quickly wither. That’s why summer varieties are usually dried this way. The advantage of this method is that there is practically unlimited space for drying, you can dry everything at once. There are a lot of disadvantages.
Apples are cut into thin slices or circles and laid out on wide baking sheets or grids in one layer. They need to be turned over every day.
Pears and apples drying in the open air
Another option is to string the apples onto strings or sticks and hang them up. To protect against flies and other insects (no one likes wormy dried fruits), you need to cover the apples with fine gauze, folded 1-2 times (which, however, is not a guarantee). It is unacceptable for the fruits to get rained on. If all conditions are met, the apples will dry in the hot sun in 3-4 days. If you dry it in the shade, it will take a little longer, up to 7-8 days.
Drying apples on a rope. Photo by: strannik-fox
Drying in the oven, on the stove, in the oven
Many housewives prepare apples in the oven Apples should be laid out evenly in 1 row on baking sheets or, better yet, on grids. Turn on the oven on low heat or set the temperature to about 75 ° C, opening the door to the size of your palm. At the end of drying, you can lower the temperature to 50-55 ° C. Check and stir the apples every one and a half to two hours if necessary. After about 7 hours, the slices will dry out. At the end of cooking, the apples should be pale, in no case brown or burnt.
Apples on a baking sheet
Some dry apples over a gas stove , stringing slices on strings, placing them on high racks or directly on a baking sheet - as desired. Such drying is quite fast, takes about 2 hours, but requires constant attention and experience: until you empirically determine the desired burner mode, drying height, cooking time, you can ruin a lot of fruit and nerves.
Choosing a variety of apples for drying
Before you dry fresh apples at home, you need to choose the right product. Overripe fruits with loose, too soft, too juicy pulp are not suitable. This is the problem with early varieties. Therefore, it is recommended to dry the autumn harvest. It has more dry matter.
Other nuances:
- thin skin. Winter apples have thick, tough skin. After the moisture evaporates, it becomes denser. It is better to dry autumn apples and unripe summer varieties;
- damage. You can dry carrion, wormy, spoiled specimens. All damage is carefully removed;
- acid. We do not recommend drying sweet varieties. They turn out grassy and don’t have the desired taste. Choose sweet and sour varieties.
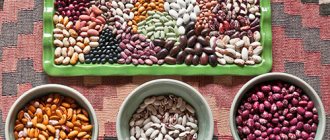
You can dry apples of the varieties Anis, Glory to the Winners, Ural Bulk, Antonovka, Pepin, Aport, Flashlight, Welsey. White filling is suitable, only slightly unripe fruits are used.
Suitable apples:
- moderate maturity;
- sweet and sour;
- autumn varieties.
Which apples are not suitable:
- overripe;
- sweet;
- loose summer varieties.
Ripe, too juicy apples can be dried, but the process will take too much time. It is better to use such fruits for jam and jam.
Basic rules for preparing dried apples
Don't try to prepare a large number of apples at once. We recommend drying it in parts and also recycling it. The cut quickly darkens and loses its attractive appearance. Therefore, use 2-3 kilograms at a time. After laying out, proceed to the next portion.
Preparation instructions:
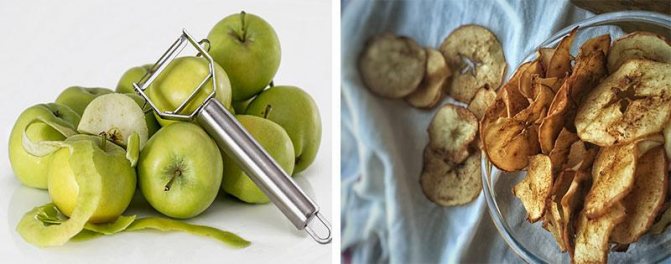
- We rinse. It is advisable to remove external contamination. Immediately wipe with a napkin.
- Let's cut it. The shape of the slices is at your discretion. You can first remove the stub with a special device, then make circles. Or immediately chop into slices. The slices look interesting. The thickness should not exceed 0.5 cm.
- Salt treatment. This is an optional step, but allows you to dry the apples without losing color. The prepared slices are immersed in a solution of 5 liters of water and 50 g of salt for 2-4 minutes.
- Soaking in a solution of sulfurous acid. The second way to keep the color light. For soaking, use 5 g of acid per 5 liters of water.
The disadvantage of processing in sulfurous acid is that the finished product will have to be thoroughly washed before use. The substance may also cause individual intolerance. Children are especially susceptible to reactions. Sometimes, to protect the color, the apple stock is simply sprinkled with lemon juice.
Clean or leave? The peel does not give rest. We recommend leaving the skin on. It dries quickly and contains a huge amount of useful substances. It is under it that pectin, important for the human body, is located.
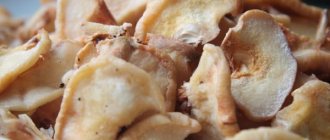
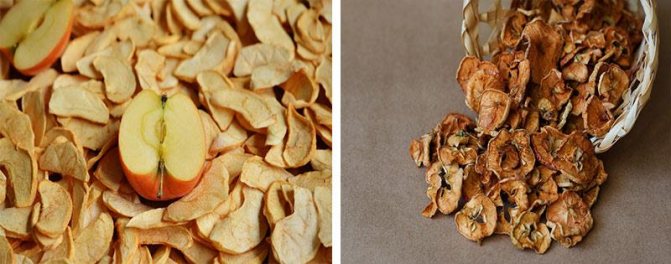
Dried apple slices
Methods for preparing dried apples at home
Fruits have been dried for centuries. They were dried in the shade and in the sun, sometimes strung on a thread, and fried in Russian ovens. Often the fruits darkened, became moldy, and turned brown. Let's figure out how best to make dried apples with minimal loss of beneficial properties.
Fruits must be prepared according to the instructions above. When processing in solutions, we recommend draining it into a colander or large sieve and letting it stand for a couple of hours to remove excess moisture. You can dry the slices on a towel.
How to dry in the oven
You can also dry sliced apples in the oven. This method is popular in autumn and is used for late fruits. There are some disadvantages. Electricity or gas consumption increases, depending on the oven used. Needs to be monitored. You won't be able to bake a pie or make a casserole until the process is completed. We'll tell you the best way to dry apples in your home oven.
Instructions:
- Arrange the apples on a baking sheet. It is convenient to use wire racks; you can install two or three at once, depending on the size of the oven. Do not overload the oven, otherwise the process will be delayed.
- Turn on the oven. First, set the temperature to 75 degrees. Open the door 4-5 cm to allow evaporating moisture to escape.
- Dry for 2-3 hours. Turn the apples periodically.
- Next, reduce the temperature to 50 degrees. Dry for another 5-7 hours. Be sure to change the nasty places. It is advisable to turn the other side. The temperature in the interior is higher than that of the open door.
We're not in a hurry to pack. Pour everything onto one baking sheet. Or we send it in a wide box. Place in a ventilated place for several days. There is residual moisture inside the dried fruits. It must be distributed. Otherwise, the workpiece will soon disappear.
It is advisable to place parchment paper under the apples on a baking sheet. The slices will not stick and will turn over easily.
How to dry in an air fryer
You can cook dried apples in the oven. But there is also a recipe for an air fryer. The device is ideal for harvesting. It removes moisture evenly. The output is a high-quality and pure product. It stores well for a long time and does not mold. The advantage of the method is speed. Thin slices will be cooked in just 1-1.5 hours.
Step-by-step instruction:
- Slice the apples into thin slices. Place on a wire rack.
- Set the temperature to about 100 degrees, low airflow.
- Turn on the device and dry for an hour.
- Check the quality of the slices. If necessary, increase the time. Sometimes the temperature is increased to 120 degrees. We do not recommend doing this. It’s better to dry it a little longer, but retain more nutrients.
- Remove the dryer and cool. Can be consumed immediately or stored.
It is not necessary to dry ordinary apples in an air fryer. Sometimes the slices are sprinkled with cinnamon. There are recipes with pre-blanching in sugar syrup. The result is a ready-to-eat dessert.
Cooking in an electric dryer
Stoves and ovens have been replaced by special appliances. Drying apples in a special electric dryer is now at the peak of popularity. Cherries, pears, various fruits, vegetables, even mushrooms and herbs are prepared in a similar way. This item will never be superfluous. Let's consider the technology for preparing dried fruits.
Dried apple slices
Step-by-step instruction:
- Chop the fruits and treat with salt solution if necessary. It is convenient to dry apple chips in an electric device. In this case, the thickness of the slices is no more than 3 mm.
- Place on trays, set to maximum setting, dry for 3-4 hours.
- Reduce temperature to 50 degrees. In most models this is the average level. Dry until ready.
The disadvantage of the dryer is uneven airflow. The lower tiers always cook faster and more moisture accumulates on top. It is advisable to change trays every couple of hours. We just take everything out one by one, then return it in the reverse order. Apples are easy to dry; turning the pieces over to the other side is not required.
You need to dry until ready, but do not overcook. Characteristics of a quality product: apple slices remain elastic, do not stick, and retain their integrity when bent.
How to dry in the microwave
Microwave oven is used for different purposes. Let's look at how to dry apples using this device. The method does not allow you to cook large quantities at the same time. Repeated spinning significantly increases energy costs. The method is used more often for preparing apple chips for snacking. You will need a flat glass plate of suitable diameter. Sometimes a piece of parchment is placed underneath.
It is important to correctly calculate the power. Since it is better to dry apples at a temperature of 50 to 75 degrees, you cannot set the maximum mode to 800-1000 W. The specified parameters are equal to power 450-500 and 600-700, respectively.
Step-by-step instruction:
- Arrange the sliced apples in one layer.
- Place in the microwave. Set power to 600-700. Dry for a minute.
- After the signal to open, release steam.
- Set the power to 500. Then dry for 30 seconds, open and check each time.
- Dry the product in short bursts until done. Total time for thin slices is approximately 5 minutes.
The advantage of this method is speed. You don't have to wait several days or hours. It is important to use the microwave in hot weather. The device does not generate heat.
Drying apples in the fresh air
Let's not forget about the old method. It is relevant for residents of the southern regions. It is also convenient to air dry summer apples. It is important to monitor the weather closely. Rainy and cloudy days are a reason to use an alternative option. Let's figure out how to properly dry apples at home.
Instructions:
- The chopped, processed slices are laid out in one layer on baking sheets. It is more convenient to use nets or gratings, then the airflow will come from different directions.
- The preparations are sent to the sun. Leave for several days.
- As the top layer weathers, we recommend stirring and turning over periodically. If flies or other insects attack, cover the drying area with gauze.
- Air dry until done. Next, the product is poured into cardboard boxes and wooden boxes. They leave it in a barn or storage room for a week or more, and check it periodically.
The main disadvantage is the duration. It will take from 4-5 days to two weeks. Exactly how much depends on temperature and dry matter content. Also, dust settles on the fruit, sometimes wasps appear, and flies attack, which are difficult to get rid of. The product cannot be consumed immediately; it will require rinsing. They air dry pears, nettles, mint, and make other preparations for the winter.
Sometimes apples are cored, rings are made, and they are dried by stringing them on a rope. This method eliminates the need to use grids and baking trays.
Features of preparing dried apples
How to dry apples for the winter
Tips for housewives:
- The first step is to choose the right variety. The fruits needed are sweet and sour, sour or winter varieties, with thin skin and a small seed capsule, medium or large to minimize the percentage of waste. Good varieties for drying: Aport, Pepin Saffron, Antonovka. Why shouldn't you dry sweet apples? When finished, the pulp becomes almost tasteless.
- The second stage is to prepare the fruits. As usual, they sort, wash, dry the fruits, and remove the rotten parts without regret. To cut off the skin or not? It is advisable to leave a healthy coating on homemade apples; store-bought fruits need to be peeled: during long-term storage, the skin is treated with chemicals and gases to prevent rotting. Natural raw materials are cut into thin rings or slices so that the pulp dries well. Pieces that are too thick turn out “rubbery,” but many housewives, when using an electric dryer or oven, prefer to cut the fruit into medium-sized pieces (6–8 pieces). To remove the core, it is convenient to use a special device - a tube with a hollow middle and sharp metal edges.
- Third stage. Decide on the choice of device or space for drying. Good options: electric dryer, grill, oven. You can place thin rings or halves on strings, hang them in the sun, and be sure to cover them with gauze to prevent flies from getting in. You can dry apples in the sun on baking sheets covered with white paper. It is also important to cover the pieces of fruit with gauze, folded in half, to protect against annoying insects.
In the oven
This proven method has many advantages, but there is one significant drawback: turning on the oven for a long time in the heat is not pleasant. Despite the fact that during drying the fruit the fire is weak, heat still enters the room, especially if you have an old-style oven that actively radiates heat into the surrounding space. Housewives must remember: be sure to open the oven door slightly to ventilate the fruit raw materials.
There are also advantages:
- the fruits dry well, moisture can be almost completely removed;
- with proper preparation and drying there is no risk of fruit molding;
- You can place a large amount of chopped fruit on 2-3 baking sheets at a time.
How to proceed:
- cut the fruit into slices no thicker than 5 mm, place on wire racks or baking sheets. It is advisable to cover the sheets with paper;
- Preheat the oven to 75 degrees, place one or three baking sheets, leave the door ajar about a couple of fingers;
- every hour and a half you need to stir or turn the slices over for uniform drying;
- the average time for moisture removal is about 7 hours;
- The finished apples are light and dry. If the rings or slices break, it means the fruit is dry. Next time you need to change the drying time, open the oven more or cut the apples thicker;
- It is important to ensure that the fire is not too high, otherwise the fruit will burn and become too dark and tasteless.
In an electric dryer
A simple, convenient method of preparing natural raw materials for the winter. A useful household appliance saves the housewife's nerves and energy, prevents the fruit from burning, as when drying in the oven, and the penetration of flies while drying in the sun.
How to dry apples in an electric dryer? Procedure:
- cut the fruits not very thick, up to 4–5 mm, place them in one layer on circles;
- in an electric dryer you can dry an average number of apples at a time, but the result is excellent;
- When all the circles are filled with slices, they are placed in the kitchen utensil. Most electric dryers have 4-5 compartments;
- the average drying time for apple raw materials is 2 hours;
- Cool the finished fruits and place them in cardboard boxes or glass containers for storage.
In the sun
The simplest, but not the best method for preparing fruit raw materials. There are no energy costs, but you need to constantly ensure that flies do not penetrate inside the gauze, which threatens the deposition of eggs and the appearance of larvae inside the dried fruit.
You can dry a lot of cut fruits in one go, but often with a large volume of dried raw materials, the apples rot and there is no time to eat them during the season. It’s no secret: dried apples are less popular among adults and children than apricots or plums; the fruits often deteriorate due to long-term storage, small brown bugs and food moths infest them.
How to make redcurrant jelly for the winter? Check out our selection of the best recipes.
Read how to keep roses in a vase longer and what you can add to the water at this address.
On the page https://poryadok-v-dome.com/rasteniya/uhod/vishnja-iz-kostochki.html you can learn how to grow cherries from pits in a pot at home.
Rules for drying in the sun:
- Cut the prepared fruits into small rings or slices, place them on baking sheets, place them in the sun, and be sure to cover them with gauze;
- in wet weather, you need to bring leaves with fruits indoors so that the raw materials do not rot;
- In hot weather, the fruit dries out in three to five days. In the shade, the drying process takes about a week. During this period, the slices or rings are turned over several times to evenly remove moisture from the fruit;
- Dried apples are quite soft and tasty; many people eat them even without soaking.