Feeding carrots.
Carrots are one of the most important vegetable crops in our gardens. In terms of the content of vitamins, mineral salts and carbohydrates, taste and dietary qualities, there is little that can compare with it. Carrots are a product whose nutritional importance is so great that they are grown almost everywhere and eaten at any time of the year. But in order to get full-fledged root crops, it is necessary to ensure proper nutrition of the plants throughout the entire period from planting to harvesting for storage.
The size of the harvest and the quality of the resulting carrot roots directly depend on what fertilizers are used for its cultivation. Most experts advise using only mineral fertilizers for feeding carrots. Compost, peat and especially manure cause increased growth of tops and contribute to the appearance of uneven and branched root crops. Even supporters of organic farming, who deny the use of any chemicals in their gardens, in this case most often agree that organic matter alone has a significantly less effect on the future harvest than its combined use with mineral additives.
The effect of different types of fertilizers on the size and quality of the carrot harvest is expressed in different ways, because it depends not only on the type of soil, but also on the degree of its cultivation. Nitrogen fertilizing can increase the carotene content in root crops and improve protein metabolism, but can reduce the percentage of sugar and dry matter. At the same time, the root vegetables become watery, uneven, with a thick and loose core. In addition, if there is too much of such fertilizing, they accumulate non-protein nitrogen, which is convenient food for bacteria and fungi. Hence the appearance of corresponding diseases, decreased shelf life and increased germination of carrots during storage.
Phosphorus fertilizers contribute less than nitrogen fertilizers to the accumulation of carotene in root crops, but they noticeably increase their sugar content. With a lack of phosphorus, inorganic nitrogen compounds are deposited in plants, and protein synthesis, on the contrary, slows down. Thus, phosphorus fertilizing causes an increase in the content of not only dry matter in carrots, but also sugar.
Unlike most other vegetable crops, carrots tolerate chlorine quite well. Therefore, potassium chloride is quite suitable for feeding it. Stove ash can also be used as potassium fertilizer, but only in cases where the stove was heated exclusively with wood.
Most often, no more than four feedings are done per season. First of all, feed immediately after the first thinning. For ten liters of water, a teaspoon of potassium magnesium and the same amount of urea, with the addition of an extract from superphosphate, are enough. To prepare the extract, pour a tablespoon of superphosphate into a liter of hot water, let it brew and carefully drain it from the sediment. Then the resulting solution is brought to ten liters.
The second feeding is carried out no earlier than two weeks after the first. Complex mixtures such as Mortar, Nitrophoska or Kemira-universal are most suitable for it. It will be safer to use them in accordance with the instructions on the package. But in any case, the concentration should not exceed two tablespoons dissolved in ten liters of settled water.
The third feeding is aimed at increasing the content of sugary substances and will be needed during the most active growth of root crops. It is very convenient for her to use ash - dry or in the form of an infusion. Fertilizer is simply scattered around the plants and the top layer of soil is carefully loosened. Or you can make an ash infusion by pouring boiling water over it and letting it sit for a couple of days. Concentration – two glasses of ash per ten liters of finished infusion.
The last fertilizing is done about a month before harvesting in order to reduce the nitrate content. Since this is a potassium fertilizer, potassium chloride or sulfate and the same infusion of wood ash are used. Potassium sulfate can be used in both solid and liquid form - two tablespoons are dissolved in ten liters of clean water. Potassium chloride – 15 grams per bucket. At the same time, you can do additional foliar feeding with a weak solution of boric acid - one gram per five liters of water.
Feeding carrots is especially important on poorly cultivated and acidic soils, where proper carbohydrate metabolism is quickly disrupted. Without additional fertilization, the content of dry matter, carotene and sugar in root crops is reduced by 2 - 6%, shelf life and the amount of vitamins are reduced.
indasad.ru
How to feed carrots?
Feeding carrots involves applying, first of all, mineral fertilizers. The fact is that the addition of compost, peat, and especially fresh manure will promote the active growth of tops, while the root crops will turn out branched and gnarled. In any case, applying exclusively organic fertilizers is indispensable.
The best option for fertilizing carrots is to apply manure under the carrot predecessors to the garden bed. Carrots do not like a very saturated soil solution, but they benefit from a high dose of minerals from their predecessor.
Fertilizing carrots is carried out taking into account the type of soil. It is not recommended to plant carrots on poorly cultivated and acidic soils, in which carbohydrate metabolism is quickly disrupted. In this case, fertilizers for carrots are simply necessary.
Nitrogen-containing fertilizers for carrots increase the carotene content in the vegetable, improve protein metabolism, but at the same time reduce the amount of dry matter and sugar. The carrots may become watery and the centers may become loose and thick. Moreover, if you overdo it and feed carrots with too much nitrogen fertilizer, a lot of non-protein nitrogen will accumulate in the root crop, which is a good environment for the proliferation of fungi and bacteria. As a result, the crop is exposed to diseases, and when carrots are stored, sprouts quickly appear and they are poorly stored.
Phosphorus fertilizers for carrots behave somewhat differently. Carotene accumulates more slowly than when using nitrogen fertilizers. But the sugar content increases noticeably. Lack of phosphorus has a detrimental effect on vegetables: protein synthesis slows down and inorganic nitrogen compounds are deposited. Phosphorus fertilizers for carrots increase the content of not only sugar in this root crop, but also dry matter.
You can feed carrots with potassium chloride. Unlike many vegetables, carrots react calmly to chlorine, so you can safely use ash as a fertilizer - even from the stove, if it was heated with wood.
When exactly and in what quantities should fertilizers be applied to carrots? There is no need to do more than four feedings per season.
How to store carrots in the ground. Storing carrots for the winter at home
Carrots are a root vegetable that is very popular. It has a pleasant taste and is rich in vitamins and minerals essential for health. In cooking, it is used in the preparation of salads, soups, and also as a side dish; it also makes excellent desserts.
Many people believe that it is impossible to store carrots for a whole year, since approximately half of the crop is lost during the natural processes of rotting. This opinion is erroneous, because if you prepare the vegetable correctly and choose the right storage method, the root vegetable is preserved perfectly and does not change its taste.
Storing carrots for the winter at home
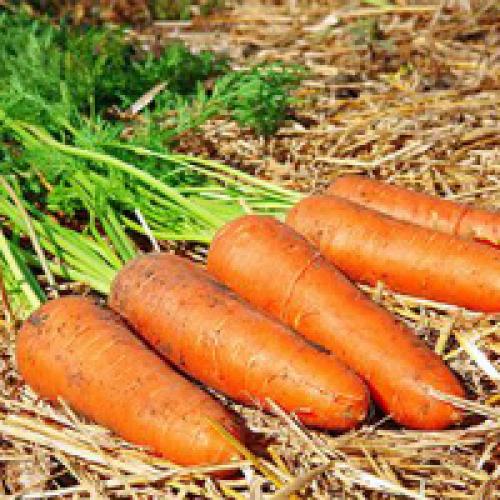
Excellent keeping quality of carrots can only be ensured by correctly chosen harvesting time. A sunny day is chosen for this.
There are also early ripening varieties that ripen by mid-summer. Such varieties are intended for consumption raw, and the shelf life of such varieties is no more than several months.
It is recommended to use a dull fork as a digging tool so as not to damage the root crop during the harvesting process. It is not recommended to use a shovel, since it is when using this tool that mechanical damage to the fruit most often occurs.
Proper harvesting is carried out as follows:
- To get a root crop out of the ground undamaged, dig up the ground around it and lightly pull the vegetable by the tops, thus removing it from the soil.
- After this, the vegetable must be cleared of soil and dried in the fresh air for several hours.
- After drying, you need to cut off the tops, stepping back a few millimeters from the green tip.
- It is recommended to sort carrots before storing them in order to select defective material that may negatively affect the duration of storage.
In order for root crops to be well preserved, they need to be provided with optimal temperature and humidity. It is noted that even with a slight fluctuation in air temperature, the processes of germination or wilting of the vegetable can begin. Carrots are perfectly stored at temperatures from 1 to + 2 degrees. The optimal humidity level should be between 90-95% (Figure 1).
Figure 1. Several effective ways to save crops
It is necessary to ensure that there is moderate ventilation in the room where the crop will be stored, since stagnation of air can lead to the appearance of rot and mold.
Fruit processing
It is much easier for people living in a private home to preserve vegetables, since they can use a cellar, a dry and cool cellar or a garage for this purpose. Residents of city apartments will also be able to preserve this vegetable using one of the proven methods.
To properly prepare root vegetables for storage, you must:
- Harvest correctly: each variety has its own harvesting time. For winter storage, it is better to use medium and late varieties, which are removed from the garden at the end of August or beginning of September, when the process of increasing mass is completed.
- Dry the vegetables: After the crop is harvested, it should be allowed to lie in the sun so that it is blown by the wind and dries.
- Tops trimming: necessary to prevent carrots from wilting and losing their flavor. To do this, remove the tops with a sharp knife or pruning shears so that the cut falls directly on the growth point. In addition, this will prevent the fruit from sprouting during storage.
Fourth feeding of carrots
Feeding carrots a fourth time is required to reduce the nitrate content in the vegetable. Sulfate and potassium chloride work well. So, a solution of potassium chloride is prepared in the ratio of 15 g of the substance per bucket of water, potassium sulfate - 2 tbsp. spoons into a bucket of water. And, again, you can use an infusion of wood ash, as with the third feeding of carrots.
Tatyana Kuzmenko, member of the editorial board of the online publication “AtmAgro. Agroindustrial Bulletin"
atmagro.ru
Advantages and disadvantages
Carrots in sand can be stored both in a cellar or garage pit, and on a regular balcony. The main rule is a large distance from heating radiators.
What other advantages of this method:
The material draws out excess moisture and keeps the fruits dry.- The sand “insulates” the carrots if the cellar is cold, or cools them if warm air penetrates into the cellar.
- The shelf life of carrots is 6-8 months.
about fertilizers for carrots...
LEGE artis
Humus is added in the fall, and ash in the spring before sowing the seeds. Humus is a long-acting fertilizer (it takes time for soil bacteria to convert these fertilizers into solutions of mineral substances accessible to the plant). Ash is a short-term fertilizer
Oleg Elizarov
The maximum yield cannot be obtained by using ash and humus. If you, for example, want to get drunk, then choose vodka, not kefir. There is alcohol in both places, but in different quantities. For maximum yield, it is better to use mineral fertilizers, but in reasonable quantities. But “ecologically friendly” and “maximum” yields are usually mutually exclusive terms.
Lina Sakharnova
Read my blog about carrots.
Irina Shabalina
I don’t use mineral water, I plant carrots after the cabbage under which humus was added, they grow beautifully, the main thing is to thin them out in time.
Olga
Humus in the fall and ash before planting. You don’t need a lot of humus. If the soil is rich in nitrogen, the carrots turn out to be horned. You need to add more sand.
Combat
Here is a site where natural plant-based fertilizers [the link is blocked by decision of the project administration] you can even get this fertilizer yourself very well, which is interesting, no chemicals.
Oleg Shelest
humus and ash are long-lasting fertilizers. The first is applied under the predecessor of carrots, that is, under cabbage, and the ash can be added in the fall when digging the soil. The ash dissolves very slowly and will provide your carrots with everything they need.
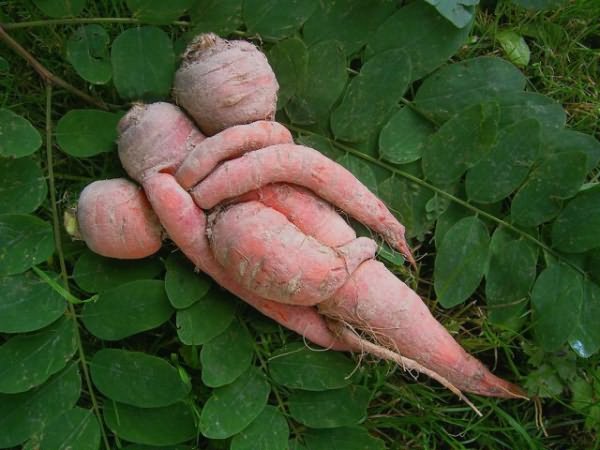
Ugly carrots. Secrets of good carrots.
Secrets of good carrots.
notes from a wild mistress
It all starts with sowing. Many gardeners stick carrot seeds. Sticking small seeds onto tapes before sowing saves time and effort. But to do this correctly, the advice of experienced summer residents will help. To begin, pour the seeds onto a flat plate, dip the tip of a small brush into starch paste, then take a seed on the brush and leave it on a paper strip. After drying, roll the strips, label the variety and store until sowing.
But now the planting is finished, you are waiting for the first shoots, but your carrots are in no hurry to please you. The reason for delayed germination may be shallow seeding (less than 1 cm) or lack of moisture in the soil. This happens because carrot seeds swell slowly, the top layer of soil quickly dries out, and hatched seeds die. To avoid this, cover the bed with old film to retain moisture, or soak the seeds before sowing for a couple of hours, changing the water up to 4 times: then the seeds will gain enough moisture. Before sowing, they are scattered and dried.
It is not recommended to keep seeds in running water - they will, of course, sprout faster, but the plants will be weak. Sometimes seeds cannot break through the soil crust, especially on clay soils, so it is better to sprinkle the crops with humus and loosen the bed after watering or rains.
Many gardeners complain that carrots are small. This usually occurs from untimely or poor-quality thinning. The first thinning occurs when the first true leaf appears. In total, you need to thin out the carrots 2-3 times, while the final distance between the root crops depends on the variety and planting method - in rows, ribbons, etc. So, cylindrical carrots need less space than conical ones.
If carrots crack, there is a reason for this too. This can happen from uneven watering, during transitions from dry, hot weather to rain. To avoid cracking, water carrots well in hot weather. Also pay attention to the ripening dates of carrots - they are indicated on the packets of seeds. In general, it is better to sow carrots at several times - separately for summer consumption and for winter storage, so that the root crops do not outgrow.
If you notice that your carrots have an ugly shape, then most likely you did not cultivate the soil for the carrots well, and the arable layer was shallow. Frequently, ugly carrots are obtained when unrotted manure or unripe humus is applied, and carrots do not like fresh organic fertilizers. The best effect is obtained when applying mineral fertilizers; the plant absorbs them well.
Most often, ugly carrots are obtained when the main root is damaged; in this case, the lateral ones quickly grow. The main root can be damaged when thinning. To avoid this, water the plantings thoroughly after pulling.
Phosphorus fertilizers contribute to the formation of regular, beautiful root crops. It is best to apply phosphorus fertilizers before planting. And the bed itself for sowing carrots must be prepared in advance so that the soil has time to settle.
The roots of the plant are also damaged when large weeds are pulled out. Carrots take a long time to sprout, and sowing of early radishes can be used to mark the rows and early weeding. Radishes and carrots, like neighbors, get along well with each other, and the harvest is impressive and without any hassle.
Interesting Facts
Crooked carrot.
This happens, and there are several reasons for this. Perhaps the soil under the carrots is heavy and clayey. The solution is to add a large amount of sand to the soil. Ugly root crops grow when using fresh manure, unripe humus, and lime. These fertilizers must be applied to the previous carrot crops. Ugly carrots are obtained when the main root is damaged; in this case, the lateral ones grow quickly. The taproot can be damaged during thinning; to avoid this, water the crops thoroughly before and after thinning. The main root is also damaged by soil pests, especially wireworms. The bed for sowing carrots must be prepared in advance, in the fall, so that the soil has time to settle. Be sure to add superphosphate to the soil. Sowing in loose, non-settled soil contributes to the appearance of ugly root crops.
Flower garden info
Crooked root crops most often appear due to delayed thinning (the first should be done when the first true leaf appears) and due to thickened plantings. A root crop with constrictions is obtained in soil of different densities.
The root crop branches if at an early stage the root hits a pebble.
Carrot roots crack and even unravel from excess moisture. Watering all root crops, not just carrots, should be stopped from the moment they form a small root crop.
Multi-tailed root crops appear when lime, dolomite, ash are added to plantings or carrots are fed with potassium chloride. Carrots do not tolerate chlorine and large doses of calcium.
Branched, non-standard, shapeless and tasteless root crops, which are poorly stored in winter, are formed if carrots are sown in the first year after applying manure.
The crops of this crop should be thinned out in a timely manner, otherwise by the fall a lot of small, deformed root crops will grow. At high temperatures combined with a lack of moisture, they become curved and rough. The optimal temperature for the growth and development of carrots is +15-22 °C. With a lack of moisture, small, irregularly shaped, woody root crops are formed.
Carrots also do not like waterlogged, heavy clay soils that form a crust: the seedlings are sparse, and the root crops are branched, crack, and are poorly stored
mediafactory
Carrots grow well on sandy, sandy loam soils and light loams. And best of all - on peat soils, for which it received the name swamp root. She needs loose, deeply dug beds. On heavy, especially clay or damp soils, the root cannot penetrate deeper and begins to branch.
If you “spray” the bed with a watering can every day, the carrots will definitely branch. Surface watering wets the soil by only 3-5 cm. Why should the root crop penetrate deeper if it is dry there? Ugliness will be guaranteed. It is better to water twice a month, but soak it to a depth of 30 cm. Moreover, water should be poured from a watering can slowly, so that there are no puddles and the moisture is absorbed evenly. After watering or rain, the soil must be loosened, but very carefully so as not to damage the roots.
So, if you want to get beautiful, even carrot roots, then:
n It’s better to sow the old fashioned way - sprinkle the furrows with live seeds with a warm hand;
n “puff up” the soil for the carrots. Lumps of clay, stones, heavy dense dry or waterlogged soils do not allow the root to penetrate deeper;
n It is better to water less often, but soak the soil onto the bayonet of a shovel;
n “the girl in the dungeon” does not like to be bothered when her tender roots are torn out along with her neighbors, so sow as little as possible.
Summer resident
Pre-sowing preparation of carrot seeds
First method
Dry seeds are poured into a fabric bag and 10-12 days before sowing they are buried on the site in damp, cold soil to the depth of a bayonet shovel. On the day of sowing, the seeds are removed from the soil, laid out on a dry cloth, dried for 20-25 minutes until they flow, and sowed. With this method, the seeds are swollen, large, easy to sow, seedlings from such seeds appear on the 4-5th day.
The second method is bubbling seeds
To do this, take a vessel with warm (25°C) water and pour dry seeds into it, and then supply oxygen or air to create better aeration conditions. Bubbling continues throughout the day. Then the seeds are removed, wrapped in cloth and stored on the middle shelf of the refrigerator for 3-5 days. Before sowing, the seeds are removed and dried until they flow. Bubbling accelerates seed germination
The third method is seed pelleting
The method involves covering the seeds with a nutrient coating. This method facilitates sowing and reduces its rate. Pelleting is done at home 3-5 days before sowing. To coat the seeds, use 1 cup of liquid mullein and prepare a soil-nutrient mixture. To prepare the soil-nutrient mixture, take 1 cup of powdered peat and humus and mix. Then take 1-2 teaspoons of dry carrot seeds and pour them into a liter jar, to which add 1-2 tablespoons of the prepared nutrient mixture and 1 tablespoon of mullein. Cover the jar with a plastic lid and shake for 1-2 minutes. While shaking, the nutrient mixture and mullein are added twice. After the seeds are coated, they are poured onto paper and dried.
The fourth method is soaking the seeds
Seeds are soaked in a nutrient solution:
First solution: 1/3 teaspoon of boric acid and 1/2 teaspoon of nitrophoska or nitroammophoska are diluted in 1 liter of warm (30°C) water.
Second solution: in 1 liter of warm (30°C) water, dilute potassium permanganate until red and 1/4 tablet of microelements or 1/2 teaspoon of liquid or dry complete fertilizer.
Third solution: 1 tablespoon (without top) of wood ash is diluted in 1 liter of warm water.
Bags of seeds are immersed in any of these solutions for 1 day. Then the seeds are rinsed with clean water and placed (in a damp cloth) in the refrigerator for 2-5 days for hardening. Then they are removed from the refrigerator, dried for 15-20 minutes until they flow, and sowing begins.
Preparing a plot for carrots
The most favorable for cultivating carrots are loose loamy and sandy loam soils with a high humus content (more than 4%) and easily permeable subsoil. The optimal soil acidity coefficient for carrots (pH) is 5.6-7, when changed, plants become prone to diseases and shelf life worsens.
Carrots must be placed in open, well-lit areas. For carrot beds, choose areas that are leveled or have a slight slope. Fresh manure is not applied to the soil under carrots. The best predecessors of carrots are potatoes, tomatoes, cabbage, greens and legumes. Carrots can be planted in the same place after 4-5 years.
Like all vegetables, carrots are a light-loving crop; in the shade, the root crops become very short and the yield is reduced by 23 times. Excess moisture in the soil causes disease in carrot roots, so in places where groundwater is close, the beds are made at least 30-35 cm high.
The density of soil for carrots should not exceed 0.65 g per square cm. On dense, poorly cultivated soils, root crops form an ugly shape, branch out, their yield and quality decrease, so compost, peat, and humus must be added to the beds.
The carrot bed is dug up in the fall to the full depth of a bayonet shovel and left until spring. On medium-heavy soils in the fall, when digging, you need to add sawdust, aerated peat (3 kg per 1 sq.m.) and sand. If the soil is acidic, before digging, add 1 cup of fluff lime, or dolomite flour, or chalk per 1 sq.m of beds. In the spring, depending on the composition and fertility of the soil, the following organic and mineral fertilizers are added to the beds
Preparing a plot for carrots
Carrots must be placed in open, well-lit areas. For carrot beds, choose areas that are leveled or have a slight slope. Fresh manure is not applied to the soil under carrots. The best predecessors of carrots are potatoes, tomatoes, cabbage, greens and legumes. Carrots can be planted in the same place after 4-5 years.
Like all vegetables, carrots are a light-loving crop; in the shade, the root crops become very short and the yield is reduced by 23 times. Excess moisture in the soil causes disease in carrot roots, so in places where groundwater is close, the beds are made at least 30-35 cm high.
The density of soil for carrots should not exceed 0.65 g per square cm. On dense, poorly cultivated soils, root crops form an ugly shape, branch out, their yield and quality decrease, so compost, peat, and humus must be added to the beds.
The carrot bed is dug up in the fall to the full depth of a bayonet shovel and left until spring. On medium-heavy soils in the fall, when digging, you need to add sawdust, aerated peat (3 kg per 1 sq.m.) and sand. If the soil is acidic, before digging, add 1 cup of fluff lime, or dolomite flour, or chalk per 1 sq.m of beds.
In the spring, depending on the composition and fertility of the soil, the following organic and mineral fertilizers are added to the beds TYPE OF SOIL FERTILIZERS APPLIED
Peat soils
Add 0.5 buckets of coarse river sand, 3-5 kg of manure humus or compost, 1 bucket of turf soil (loamy or clayey). From mineral fertilizers, scatter 1 teaspoon of urea (urea) or sodium nitrate, 1 tablespoon each of superphosphate (crushed into powder) and potassium sulfate or potassium chloride. After adding all the components, the bed is dug up to a depth of 25-30 cm (since most varieties of carrots form long roots). The surface of the bed is carefully leveled and compacted. The bed is prepared 2-3 days before sowing. To avoid moisture evaporation and to retain heat, it is covered with film.
Clayey and podzolic soils
Add 1 bucket of coarse sand and peat, 0.5 buckets (3-5 kg) of humus. From mineral fertilizers, add 1 tablespoon of crushed superphosphate and nitrophoska.
Light loamy soils (composed of clay and sand)
They fertilize in the same way as clay ones, but do not add sand.
Sandy soils
Add 2 buckets of turf soil, peat, 0.5 buckets of humus and 1 tablespoon of Agricola-4 fertilizer.
Chernozem fertile soils
Add 2 tablespoons of powdered superphosphate.
Newly developed lands (virgin lands)
When digging, you must carefully select all rhizomes, especially wheatgrass, wireworm larvae and May beetles. In the first year of planting on these soils, the carrot yield is high even without fertilization. Sowing carrots
The timing of sowing has a decisive influence on the carrot yield. Slowly germinating seeds require significant soil moisture and are sown as early as possible while there is sufficient spring moisture in the soil. When sowing is delayed, the seeds fall into dry soil and produce weak shoots, and sometimes do not germinate at all.
In the middle and central zone, the following dates for sowing carrots are observed: early varieties from April 20 to 25; mid-season - from April 25 to May 5. In the southern regions, sowing is carried out in 2 terms: spring - March 10-20, to obtain products in the summer; and summer - June 10-15, for obtaining testes (uterine roots) and winter consumption.
Before sowing, grooves are made along the bed, 5 cm wide and 2-2.5 cm deep. The first groove is made at a distance of 12 cm from the edge of the bed. Subsequent grooves are placed at a distance of 20-22 cm from each other. The width of the bed is 110 cm, the direction of the bed along its length is from north to south.
Before sowing the seeds, the furrows are watered with water or a red solution of potassium permanganate. In wet grooves, moist, swollen seeds prepared for sowing are scattered scattered or in a snake at a distance of 1-1.5 cm from each other. The furrows with seeds are mulched with peat or a mixture of peat and sand and covered with film so that there is a small space (12-15 cm) between the bed and the film. The film retains moisture, increases heat, and after 5 days friendly shoots appear. When shoots appear, the film is immediately removed.
Often seeds are sown densely in narrow and deep furrows, which is why the seedlings are dense and the plants are weak. It is difficult to thin out such a bed. Thinning can be shortened by mixing 1 teaspoon of seeds with 1 cup of sand and dividing into 3 parts. Each part is sown on 1 sq.m of bed.
Winter sowing of carrots
To obtain an early harvest, carrots are sowed in winter. For this, the earliest varieties are used - Moscow Winter, Nantes-4, NIIOX-336. The site must be fertile and protected from the winds. Preparing it for sowing must be completed before mid-October.
Before plowing (to a depth of 22-25 cm), you need to add 2-3 kg/sq.m of humus and 10-15 g/sq.m of phosphorus and potassium fertilizers. The area must be harrowed and the ridges immediately cut, and then slightly leveled on top and furrows 4-5 cm deep made on them. By the time of sowing, the soil will be compacted and the depth of the furrows will be at the level of 3 cm. The area prepared for sowing remains in this form until the onset of frosts.
Around mid-November, on frozen soil, seeds with high germination are sown, increasing the seeding rate by 20-25% compared to spring sowing. Sow dry seeds so that they cannot germinate until spring, otherwise the seedlings will freeze. The furrows are covered with a layer of 0.5-1 cm of earth and sprinkled with peat or humus with a layer of 2.5-3 cm. In this form, the crops overwinter.
In the spring, when the soil begins to dry out, in order to create normal conditions for the germinating seeds of winter carrots, the soil crust is destroyed. After mass germination of carrots, 15-20 g/sq.m of nitrogen fertilizers are applied and incorporated into the soil near the row. Further care consists of keeping the soil loose and free of weeds. Young carrots can be obtained by mid-June.
Caring for carrots
Caring for carrot plants involves loosening and weeding, thinning, watering, fertilizing, and controlling pests and diseases. As soon as the seedlings appear, they begin to carefully, slightly loosen the soil between the rows to a depth of no more than 3-4 cm while simultaneously destroying the weeds. Loosening and weeding are carried out after watering and rains.
During the growth of carrots, it is necessary to ensure that the tops of the root crops are not exposed, since in the light they form the alkaloid solanine, which makes the carrots bitter. That is why, during the formation of root crops, it is necessary to carry out loosening and hilling so that the heads are covered with earth. In the phase of two or three leaves, the seedlings are thinned at a distance of 4 cm. During thinning of the plants, a carrot smell appears, which attracts the carrot fly. Therefore, it is better to do this in the evening, and remove the pulled out carrot plants to the compost heap and cover with earth or sawdust. When thinning carrots, it is recommended to dust the bed with ground pepper to drown out the carrot smell.
Carrots prefer even watering. When there is a lack of moisture in the soil, root crops grow coarse and woody, and when there is too much moisture, the tops and core grow strongly, and the growth of root crops stops.
Regular watering of carrots is especially important during seed germination and root system formation, as well as during leaf growth. Approximately 65-70 days after emergence, the carrot root system reaches a depth where the moisture of the lower layers of the soil becomes available to it. The proximity of ground water (less than 60-80 cm) leads to severe branching and deformity of root crops. A sharp transition from dryness to high soil moisture causes cracking of root crops.
Therefore, in order to get a high yield of even, beautiful root crops, carrots are watered, starting from germination, moderately and regularly. In sunny, warm weather, young plants are watered 1-2 times a week from a watering can in small doses (3-4 liters per 1 sq.m.). Subsequently, when small root crops (thickness of a pencil) begin to form, water once a week, gradually increasing the dose from 10-12 to 20 liters per 1 sq.m. In September, when there is a strong influx of root crops and there is no rain, watering is done once every 10-12 days at the rate of 8-10 liters per 1 sq.m. During the period of appearance of the fifth or sixth leaf, it is necessary to carry out foliar and soil fertilizing with mineral fertilizers (5-10 g/sq.m). Organic fertilizers for carrots (3-4 kg/sq.m) - humus or composted peat - are applied only on soils with a humus content below 3%.
Diseases and pests of carrots
The two tables below list the main diseases and pests of carrots. Click on the name of the disease/pest to open the corresponding page with a detailed description of the symptoms of the disease and methods of prevention and control.
You should know that most often carrots are affected by several pests at the same time. These are mainly carrot fly and carrot psyllid. Therefore, the fight against them must be carried out comprehensively. In autumn, in any case, you should carefully dig up the soil, destroy all plant debris and follow the rules of crop rotation.
Website creator Yuri Novitsky
Garden
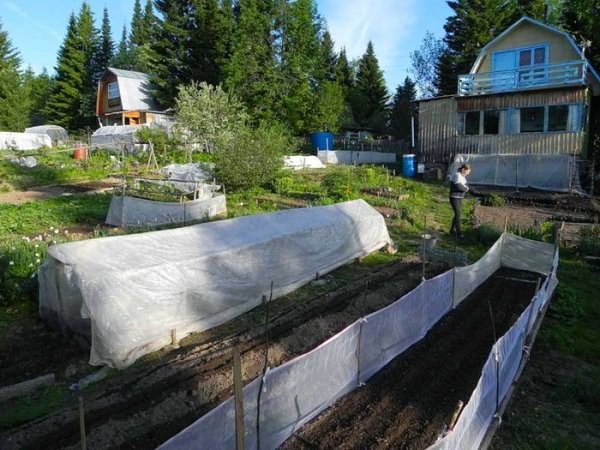
We have been fighting carrot flies for a long time. It's rare that there are good tops and clean, smooth roots in a year. The usual thing is reddish-purple tops that turn yellow and dry out, damaged root crops, ugly, with constrictions, large losses when peeling carrots. And after lying down, it also becomes bitter. So you have to spend time and energy fighting this fly! Like every experienced gardener, we use standard pest control methods. This includes constant weed control, digging up the soil in the garden bed in the fall, and, of course, crop rotation. We tried planting carrots and onions next door, alternating plantings in the garden, and sowing early. Alas, all this does not give tangible results! Considering that egg-laying female carrot flies are low-flying insects, we conducted an experiment. Carrots and onions were planted in one bed, and the second bed with carrots was fenced with fine mesh.
The result exceeded expectations! The carrots in the onion bed were all eaten.
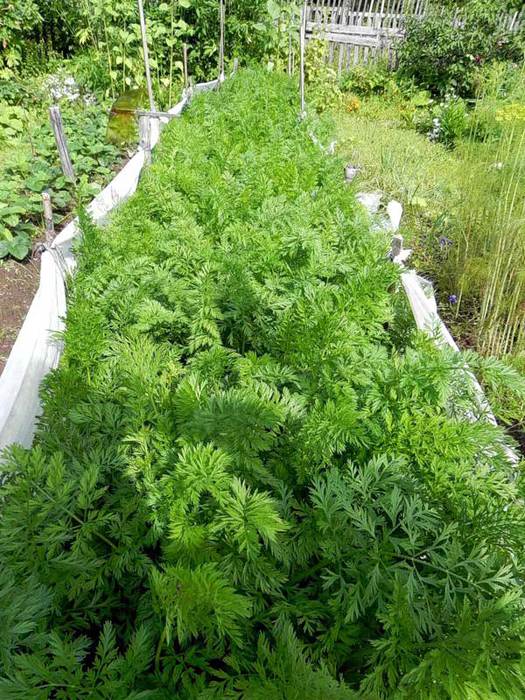
And here is a carrot in a fenced garden bed. At the same time, the root vegetables were clean, beautiful and juicy! You can fence a bed with carrots with a fine mesh net, the height of the fence is 50 – 90 cm. You can also use polyethylene, but this will reduce ventilation. Our height was 50 cm.
Art.Thelib,RU
The bed is prepared in the fall, placing it so that the wind blows along it, which helps protect against carrot flies. The seeds are placed in white fabric bags and rinsed in hot water (50-55 degrees) for 15-20 minutes. The same is done with dill and parsley seeds, which speeds up seed germination by almost two weeks. Then they are immersed in a humic solution for 5-6 hours. After which the seeds are kept in a damp cloth in a warm place for 2-3 days. Along the ridge, three depressions of 0.5 cm each are made at a distance of 30 cm from each other. Spill them with a hot solution of potassium permanganate or humic agent and after 30 minutes. sow seeds. Sprinkle them with the back of the hoe and lightly compact the soil. Thick paper is placed between the grooves so that the weeds do not sprout before the carrots. The bed is covered with spunbond without watering! Otherwise, the seeds may shoot down.
And when sowing in early spring, small arcs are also placed over the bed and covered with ordinary film. When the sprouts grow to 3-5 cm, the film is removed. For summer crops, nitrogen fertilizer is applied in early August so that roots and rosettes of leaves are better formed. Root growth stops during drought, but resumes after watering - this is how ugly root crops are obtained. This cannot be allowed. Water carrots at the roots - dew from sprinkling promotes the development of diseases. First watering, when the seeds begin to sprout: put a canvas bag on the hose or watering can to reduce the pressure and disperse the water.
Interesting methods at home
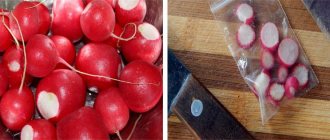
How to store in cling film?
This method is one of the most common and effective. Procedure:
- Wash the harvested crop thoroughly, trim the tops, and assess the condition. If the carrots have any damage, they are thrown aside.
- For longer storage, root vegetables can be sprayed in advance with an infusion of onion peels. To do this, take 100 g of raw materials and 1 liter of water. Leave for 5 days.
- You can immerse root vegetables in this infusion for 10 minutes, then place them on a dry cloth to dry thoroughly.
- Wrap each root vegetable in cling film 4-5 times.
- Make sure that all parts of the carrot are wrapped and do not touch the neighboring vegetable.
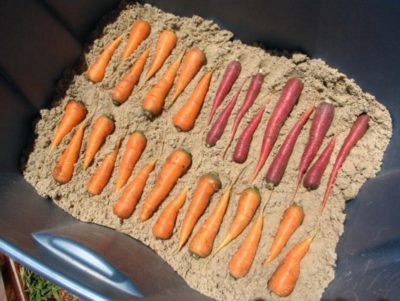
In the ash
Storing carrots in ashes is great for storing vegetables in the basement. Procedure:
- Combine ash and chalk powder in a 3:1 ratio.
- Place the mixture in a wooden container.
- Wash the crop, remove the tops, dry it, place it in ash with chalk, thick ends up, and lightly sprinkle with the mixture.
IMPORTANT: Thanks to chalk, you can stop the growth of bacteria and preserve the freshness and taste of carrots for a long time.
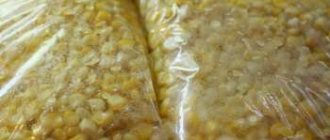
By vacuum packing
For this method, you need to prepare film bags with a capacity of 5-30 kg. Store plastic bags with root vegetables in cool rooms. The air humidity in the bags is 96-98%, so the carrots will not wither. Moreover, during storage of vegetables they must be open.
If you tie them, there will be an accumulation of carbon dioxide, the concentration of which will be several times higher than the oxygen content. This will cause the carrots to spoil. You can store it in closed bags, but then you will have to take care of ventilation. Just make a few holes. The procedure is as follows:
- Wash and dry the carrots (about whether you need to wash carrots before storing them is written in detail here).
- Place it in prepared bags (about 5-6 carrots in one bag).
- To close the bags, you can use the old proven method - an iron. Place the two edges of the bag together, place the newspaper on top and run a hot iron over it. Under the influence of high temperature, the edges of the bag stick together.
- You can also remove air from a bag of vegetables using a vacuum cleaner.
- Place the bags in any box (plastic or wooden) and place it in the basement or pantry.
During storage, condensation may form on the inner surface of the bags. It indicates high humidity in the room. This can be prevented by scattering fluff lime near the bags of carrots. It will be able to absorb excess moisture.
Storing carrots in vacuum packaging:
In the caisson
A caisson is a waterproof structure. In other words, this is a box that is externally equipped so that air from outside does not enter it. This is an excellent way to store carrots, for which a number of measures must be taken:
- Wash the carrots thoroughly, remove the tops (how to properly trim carrots for storage is described here).
- Dry the root vegetables in the shade, and after drying them thoroughly, place them in plastic bags (5-6 pieces).
- Place the vegetables ready for storage in the caisson on the same day.
- The box itself can be left in the pantry or lowered into the cellar.
In the vegetable store
Vegetable storage facilities are used to store large quantities of root crops. But this method has one drawback - the carrots that are on top spoil due to excess moisture. But it is impossible to completely deprive it of moisture, as this will cause it to wither. To extend the storage of carrots in the vegetable store, you must follow these simple recommendations:
- The vegetable storage area must be ventilated regularly (every 1-2 days).
- Cover the top of the carrots with burlap.
- To increase air humidity, you can place a container of water in the room.
In newspapers
This method is the simplest and no less reliable. All you need is to wrap the already peeled carrots in newspaper. Make sure that the entire root vegetable is completely covered in paper. Place the finished vegetables in a box and place it in a cool room (our material tells us what temperature should be in the room for long-term storage of carrots).
In an aluminum tank
There is a very interesting way to store carrots in an aluminum tank. If this storage option is chosen, the procedure is as follows:
- Wash the carrots thoroughly, cut off the tops and place on a dry cloth to dry.
- Place the root vegetable in the tank in an upright position, and cover the top with a paper towel.
- Close the tank lid and place the container in a cool place with high humidity.
TIP: With this storage method, carrots will retain their original appearance until the next harvest.